Mit der Location Referencing-Lizenz verfügbar.
The Select Events by Route widget in the ArcGIS Event Editor allows you to select events by specifying their measure(s) to an associated route or line. Engineering Station network events can be either searched using line or route name. Continuous network events can be selected using route names. Once the events are selected, they can be browsed and edited.
- Open Event Editor and, if prompted, sign in to Portal for ArcGIS or ArcGIS Online.
- Click the Edit tab.
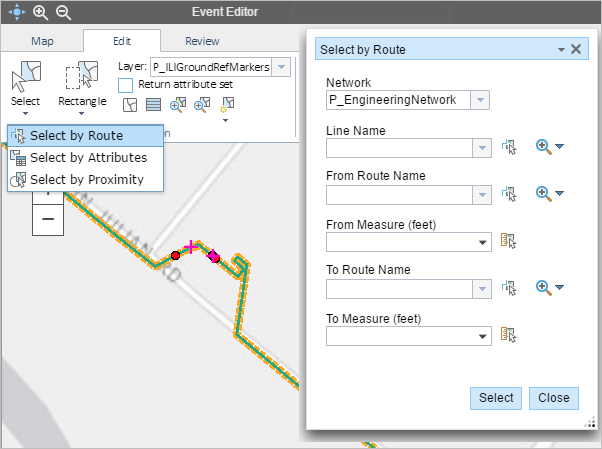
- In the Selection group, click the Select drop-down arrow and click Select by Route.
The Select by Route widget appears.

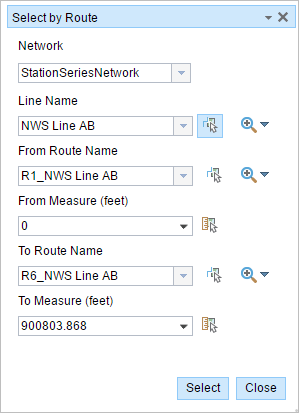
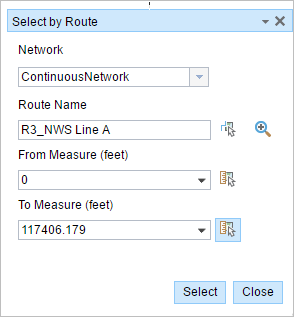
Depending on the network selected, the Line Name search option may or may not appear. For example, if an Engineering Station Network that supports events spanning routes is selected, then you can search events based on line name and/or route name. In a Continuous Network, events do not span routes so the Line Name search option is unavailable.

Line Name option is available in an Engineering Station Network 
Line Name is unavailable in a Continuous Network - Click the Layer drop-down arrow and choose an event layer.
This is the event layer from which you will select events.
Additionally, you can navigate the list of layers by keystroke. For example, press S key in the drop-down menu to jump to the first layer in your list that begins with the letter s.
- The network associated with the event is selected automatically, but you can choose another network using the Network drop-down list.
- Provide the route ID on which the events are located.
Tipp:
You can also click the Select a Route on the Map button
 to select the route on the map.
 - If Engineering Stationing network is selected, provide a line name on which the events are located.
Tipp:
Alternatively, click the Select a Line on the Map button
 to select the line on the map.
 - Provide the From Route Name on which the events are located.
Tipp:
You can also click the Select a Route on the Map button
 to select the route on the map.
 - Optionally, provide the source measure value of the route in the From Measure text box.
The selection can be constrained to events that intersect a specified source and target measure on a route by entering these values.
Tipp:
Alternatively, click the Use Start of the Route drop-down arrow or the Select From Measure on the Map button
 to select the measure on the map.
 - Provide the To Route Name on which the events are located.
Tipp:
Alternatively, click the Select a Line on the Map button
 to select the line on the map.
 - Optionally, provide the target measure value of the route in the To Measure text box.
In cases where the source and target route measures are not provided, those events associated with the selected route will be highlighted.
Tipp:
Alternatively, click the Use End of the Route drop-down arrow or the Select From Measure on the Map button
 to select the measure on the map.
 - Click Select.
- Those events in the source and target measures of the given routes and lines will be highlighted on the map.
- The results are also shown in a tabular format where the event records can be edited.