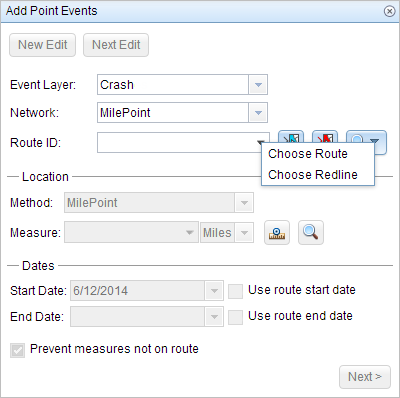
Characteristics of a route, such as crashes and traffic count sites, can be represented as a point event offset from an existing point feature class. The Point Events widget provides an interface to add point events into the geodatabase. The referent offset data is translated to routes and measures for storage.
Hinweis:
The referent point feature layer must be in the same map service as the route network layer.
- Open ArcGIS Event Editor and, if prompted, sign in to Portal for ArcGIS or ArcGIS Online.
- Click the Edit tab.
- In the Edit Events group, click the Point Events button
 .
.The Add Point Events widget appears.
If there are no editable point event layers, the widget is disabled.
- Choose an event layer you want to edit from the Event Layer drop-down list.
- Click the Network drop-down arrow and choose the network that will serve as a source linear referencing method (LRM) for defining the input measures for the new events.
The Network is an LRS Network published as a layer in the Event Editor.
You can specify the LRS Network to be used as the linear referencing method (LRM) for defining the measure of the new point event. The widget accepts an LRS Network as a source to identify the location for adding the new point event. However, when the new point event data is being stored in the database, the app performs an internal translation of measures to always store the measure value in the LRM of the LRS Network with which the event is registered.
- Type a route ID in the Route ID text box on which the new event measure will be based.
Tipp:
You can also click the Select a Route on the Map button
 to select the route on the map.
Hinweis:
If a message appears that is related to acquiring locks, the need to reconcile, or not being able to acquire locks, Roads and Highways conflict prevention is enabled.
Learn more about conflict prevention in the ArcGIS Event Editor
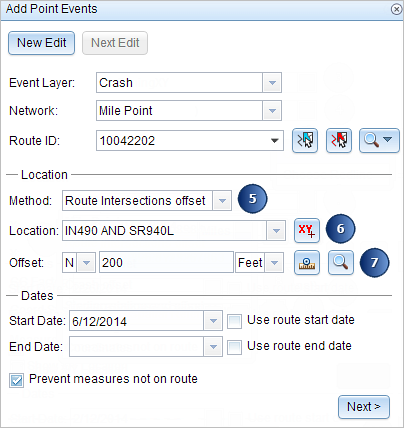
- In the Location section, click the Method drop-down arrow and choose Route Intersections Offset.

- For the Location option, click the Select a Location on the Map button
 to choose a point feature that participates in the layer selected for offsetting on the map.
 - Provide the Offset value for the referent offset using any one of these options:
- Choose the direction of the offset using the Direction drop-down arrow, type the offset value, and choose the units.
- Type the value and choose the units.
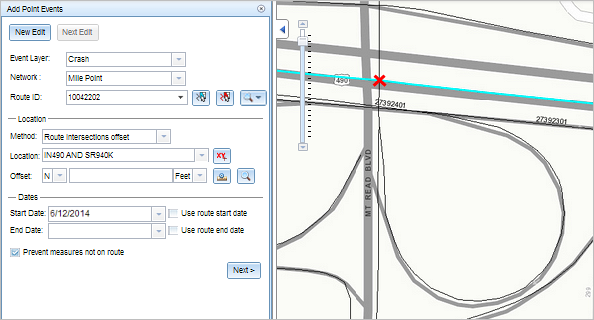
- Use the Select an Offset Location on the Map tool
 to pick a location along the route on the map.
A red cross is placed on the new offset location along the route on the map.

- Click the Start Date and End Date calendar controls to choose the start and end dates of the event.
The start date defaults to today's date, but you can select a different date using the date picker. The end date is optional.
Hinweis:
If you configured your ArcGIS Event Editor instance to not allow dates prior to the start date of the route, and you enter a date prior to the start date of the selected route in Start Date, a warning message appears alerting you to select a date on or after the start date of the selected route.
- Click Next to view the Attribute Value table.
This table contains all the attributes of the event layer.
Hinweis:
Coded value, range domains, and subtypes are supported when configured for any field in the Attribute-Value table.
- Provide attribute information for the new event in the table.
Tipp:
You can click the Copy Attribute Values button
 and click an existing point event belonging to the same event layer on the map to copy event attributes from that point.
 - Check the Show network name check box to see the LRS Network with which the selected event layer is associated.
- Click Save.
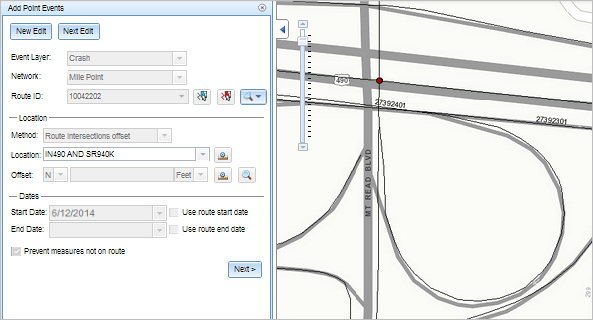
A confirmation message appears at the lower right once the newly added point event is saved. The new point is created and appears on the map.

After an event has been successfully created, you have the following two options to continue characterizing the route:
- Click New Edit to clear all the input entries in the widget and restore the default values from the geodatabase to the attribute table.
- Click Next Edit to retain all the existing entries in the widget and the attribute table for the convenience of quick editing of similar characteristics.